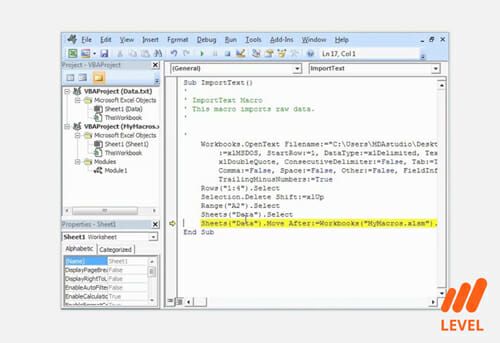
VBA Cell References
Performing actions with macros in VBA
What are VBA Cell References?
After creating the macro and declaring the variables, the next step is to create VBA cell references, which actually refer to each variable and can then be used to manipulate the data within the Excel sheet. Performing actions on variables for data reference are known as VBA methods.
To do this, you need to know the different methods you can apply within VBA. The ideal first step is to learn how to refer to specific data cells.
Learn more in CFI’s VBA Modeling Course.
VBA Cell References – Referencing Files and Worksheets
To know which data it needs to manipulate, you need to tell Excel where to find the data. This is done in the following hierarchy: Workbook (Excel File) > Worksheet > Range or Cell. If you skip levels of the hierarchy, Excel will simply assume that it should look in the currently active Workbook or Worksheet. You cannot skip the last level. You need to tell Excel a specific range or cell or tell Excel to look in the active cell. Telling Excel which workbook and worksheet to look under is not necessary, but is valuable when multiple workbooks and worksheets are open.
- To refer to a workbook: Workbooks(“NameOfFile.xls”).
- Use the specific name of the file, followed by the extension.
- To refer to the current workbook, the macro is located in: ThisWorkbook
- To refer to the active workbook: ActiveWorkbook
- To refer to a worksheet: Worksheets(“Sheet1”) or Sheets(“Sheet1”)
- Use the name of the sheet.
- To refer to the active worksheet: ActiveWorksheet
VBA Cell References – Selecting Ranges or Cells
Selecting ranges and cells works a bit differently compared to selecting books and sheets. You can select one or more cells (known as a range) or even multiple ranges. Looking at the code, you may be familiar with it, as the text enclosed in the parenthesis is similar to that used in Excel formulas.
- Selecting one cell: Range(“B5”)
- Selecting one range: Range(“B5:D5”)
- Selecting multiple ranges and cells: Range(“B5:D5,E10:J50,M99”)
- Selecting the active cell (whatever is currently selected in the Excel file): ActiveCell
- Selecting the active selection (multiple active cells): Selection
- Selecting all cells within a current worksheet: Cells
VBA Cell References – Putting it All Together
Now that you know how to refer to books, sheets, and cells, you need to combine these into one line, separated by a period symbol. For example, to select range A42 to D45 in sheet3 of the currently active workbook:
ActiveWorkbook.Sheets(“sheet3”).Range(“A42:D45”)
This is the VBA cell reference that Excel needs to find the data you want to work with. However, now you need to tell Excel what to do with the data. This is where you start working with methods.
Manipulating VBA Cell References
From here, it gets a little complicated. Each reference has many different actions (known as “methods”) that it can take, and certain references have methods that are unavailable to others. However, to keep things simple, let’s discuss how to tell Excel to select and highlight the data in the model, how to copy it, and how to store it.
To highlight the data in the model, the proper method to use is “Select” or “Activate”.
ActiveWorkbook.Sheets(“sheet3”).Range(“A42:D45”).Select
ActiveWorkbook.Sheets(“sheet3”).Range(“A42:D45”).Activate
Running this macro by pressing F5 will cause Excel to highlight the range A42 to D45.
To copy the data in the model, the method to use is “Copy.”
ActiveWorkbook.Sheets(“sheet3”).Range(“A42:D45”).Copy
Running this macro will tell Excel to copy the contents of the range to be pasted later. If you run this macro, you’ll notice that Excel will highlight the range with the “running ants” that you normally see when you copy data.
To access the value in a cell, you use the “Value” method. Using value, you can store the value in a cell within a variable, or copy the exact value of that cell into another cell. Note that the value command does not work with ranges. It will only work with singular cells.
Range(“A45”).Value = Range(“A42”).Value
Macros will always read from left to right. This means that Cell A45 will now contain the value within Cell A42 after the macro is run.
To store the value of a cell in a variable, you use the “Value” method, but you must also tell Excel which variable to store it under. This action won’t work for a range, as Excel can only store one piece of data within each Variable.
Dim myVariable as String
myVariable = ActiveWorkbook.Sheets(“sheet3”).Range(“A42”).Value
If, for example, range A42 contained the phrase “Corporate Finance Institute”, it would be now stored under the myVariable string variable. You can use this method to store values for later use. This action is also useful when you need to use the same piece of data multiple times, so you don’t have to type the long reference each time. Instead of typing the workbook, sheet, and range, you can simply use the variable you stored it under.
Additional Resources
Thank you for reading CFI’s guide on VBA Cell References. To keep learning and developing your knowledge base, please explore the additional relevant resources below:
Excel Tutorial
To master the art of Excel, check out CFI’s Excel Crash Course, which teaches you how to become an Excel power user. Learn the most important formulas, functions, and shortcuts to become confident in your financial analysis.
Launch CFI’s Excel Crash Course now to take your career to the next level and move up the ladder!

