Get In-Demand Finance Certifications
This article outlines how to add months to a date in Excel
In Excel, you can add a number of months to a date[1] using the EDATE function. This can be very useful when performing financial modeling and you are adjusting time periods. This is a step by step guide on how to have Excel Add Months to Date.
For example, if you want to have a monthly financial model, you can add one month to the start date. If you want a quarterly financial model, you can add 3 months to the start date.
Download the Free Excel Template – Add Months to Date
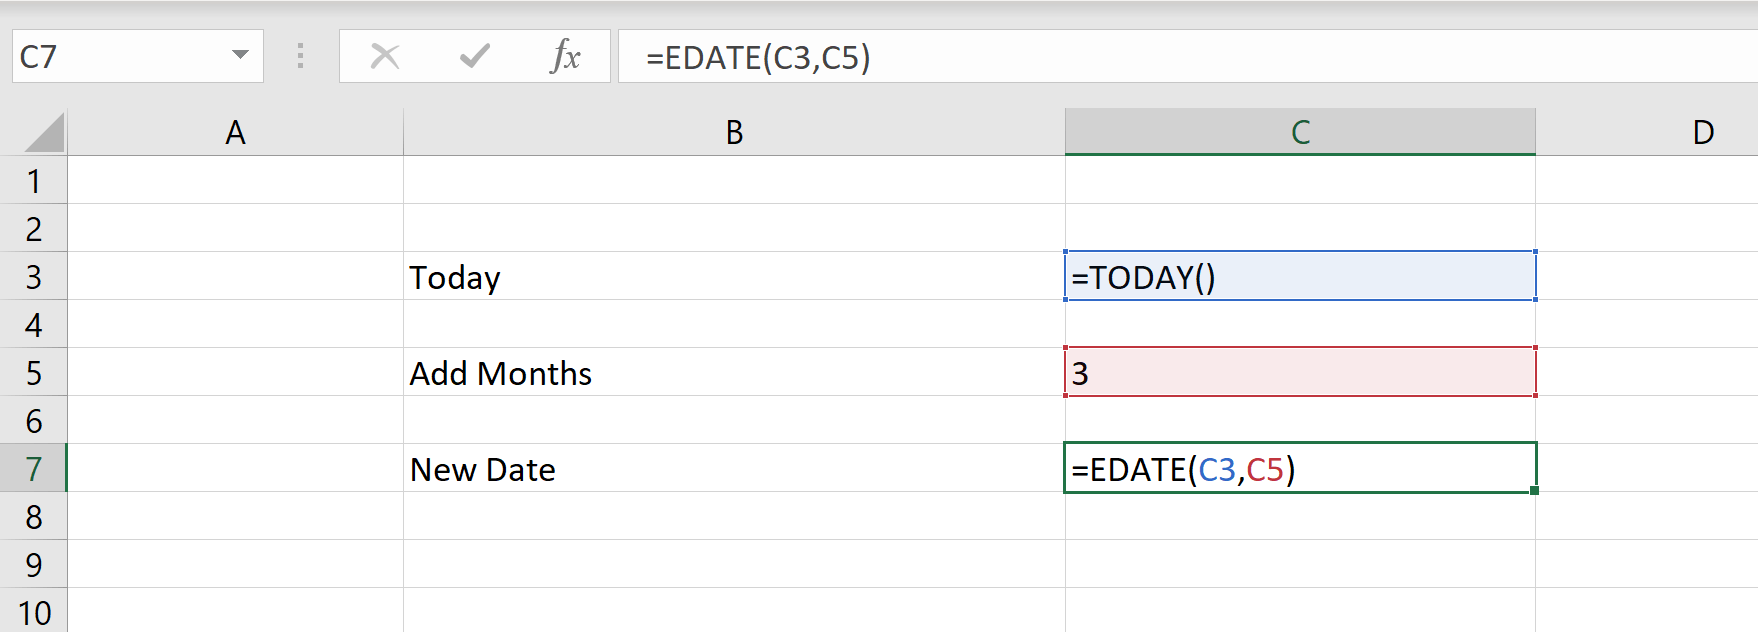
=EDATE(start date, number of months)
(See screenshots and example below)
Follow the steps below to perform this procedure on your own:
Step 1: Ensure the starting date is properly formatted – go to Format Cells (press Ctrl + 1) and make sure the number is set to Date.
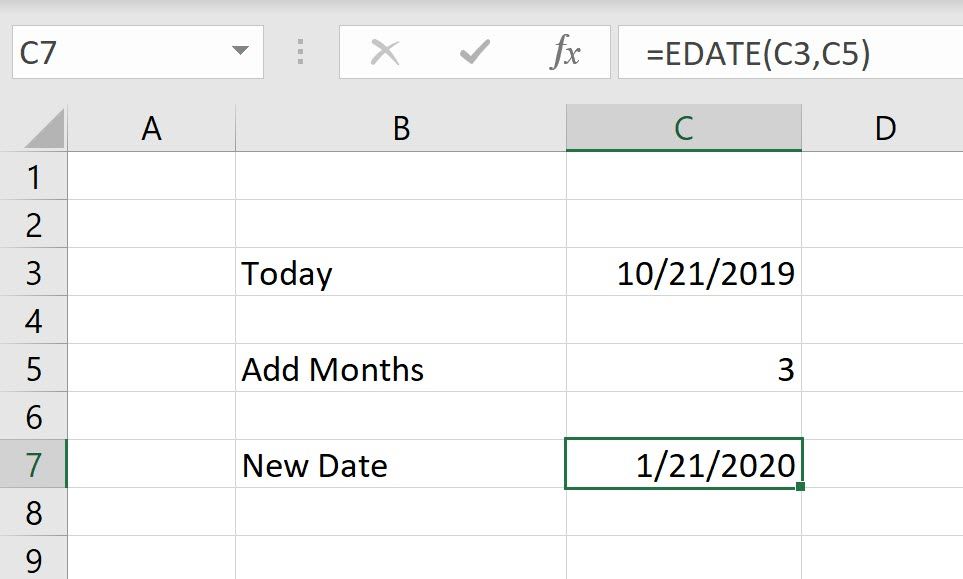
Step 2: Use the =EDATE(C3,C5) formula to add the number of specified months to the start date. Where cell C3 is equal to today’s date [the TODAY() function] and cell C5 is equal to the number 3.
Step 3: Make sure the output cell is formatted as a Date, and not as a general number (press Ctrl +1 and select Date)
Congratulations, you have now added months to a date in Excel!
Formula:
Finished product:
It’s as easy as that!
Connect what you just learned to a clear career path with CFI’s role‑based courses and certification programs.
Thank you for reading CFI’s step by step guide to learning how to add months in Excel. As mentioned above, this is a very common practice in financial modeling and a very useful formula for financial analysts. The best way to become a master at Excel is by practicing… a lot.
To get more practice, check out these additional CFI self-study guides which will show you how to perform advanced functions and formulas:
To master the art of Excel, check out CFI’s Excel Crash Course, which teaches you how to become an Excel power user. Learn the most important formulas, functions, and shortcuts to become confident in your financial analysis.

Launch CFI’s Excel Crash Course now to take your career to the next level and move up the ladder!