Get In-Demand Finance Certifications
The best way to keep spreadsheets organized
Grouping rows and columns in Excel[1] is critical for building and maintaining a well-organized and well-structured financial model. Using the Excel group function is the best practice when it comes to staying organized, as you should never hide cells in Excel. This guide will show you how to group in Excel with step-by-step instructions, examples, and screenshots.

Looking to be an Excel wizard? Increase your productivity with CFI's comprehensive keyboard shortcuts guide.
The Excel group function is one of the best secrets a world-class financial analyst uses to make their work extremely organized and easy for other users of the spreadsheet to understand.
Reasons to use the Excel Group Function:
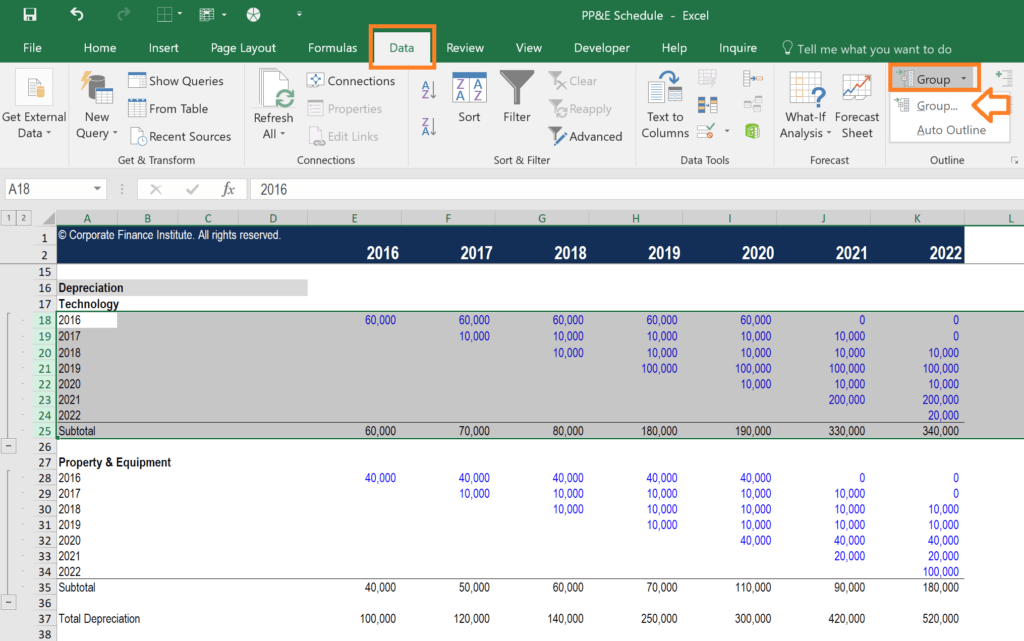
The function is found in the Data section of the Ribbon, then Group.
Let’s look at a simple exercise to see how it works. Suppose we have a schedule in a worksheet that is becoming quite long, and we want to reduce the amount of detail that’s shown. The screenshots below will show you how to properly implement grouping in Excel.
Here are the steps to follow to group rows:
You can repeat the steps above as many times as you like, and you can also apply it to columns as well.
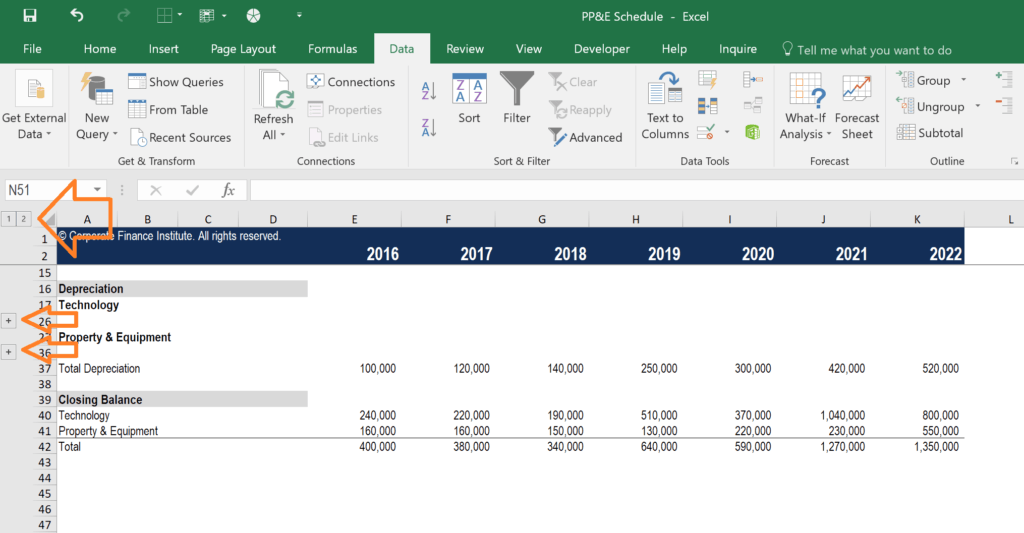
Once you’re finished, you can press the “-” buttons in the margin to collapse the rows or columns.
If you want to expand them again, press the “+” buttons in the margin, as shown in the screenshot below.
There is also a “1” button in the top left corner to collapse all groups, and a “2” button to expand all groups.
Though many people do it, you should never hide cells in Excel (or spreadsheets either, for that matter). The reason is that Excel does not make it clear to the user of the spreadsheet that cells have been hidden, and thus they may go unnoticed.
The only way to see that cells are hidden is to notice that the row number or column number suddenly jumps (e.g., from row 25 to row 167).
Since other users of the spreadsheet may not notice this (and you may forget yourself) you should never hide cells in Excel.
You can download the Template for free if you wish to use it as an example or starting point for how to group in Excel and apply it to your own work and financial analysis.
Thank you for reading CFI’s guide to Group in Excel. To continue learning and advancing your career, these additional CFI resources will be helpful:
Below is a break down of subject weightings in the FMVA® financial analyst program. As you can see there is a heavy focus on financial modeling, finance, Excel, business valuation, budgeting/forecasting, PowerPoint presentations, accounting and business strategy.
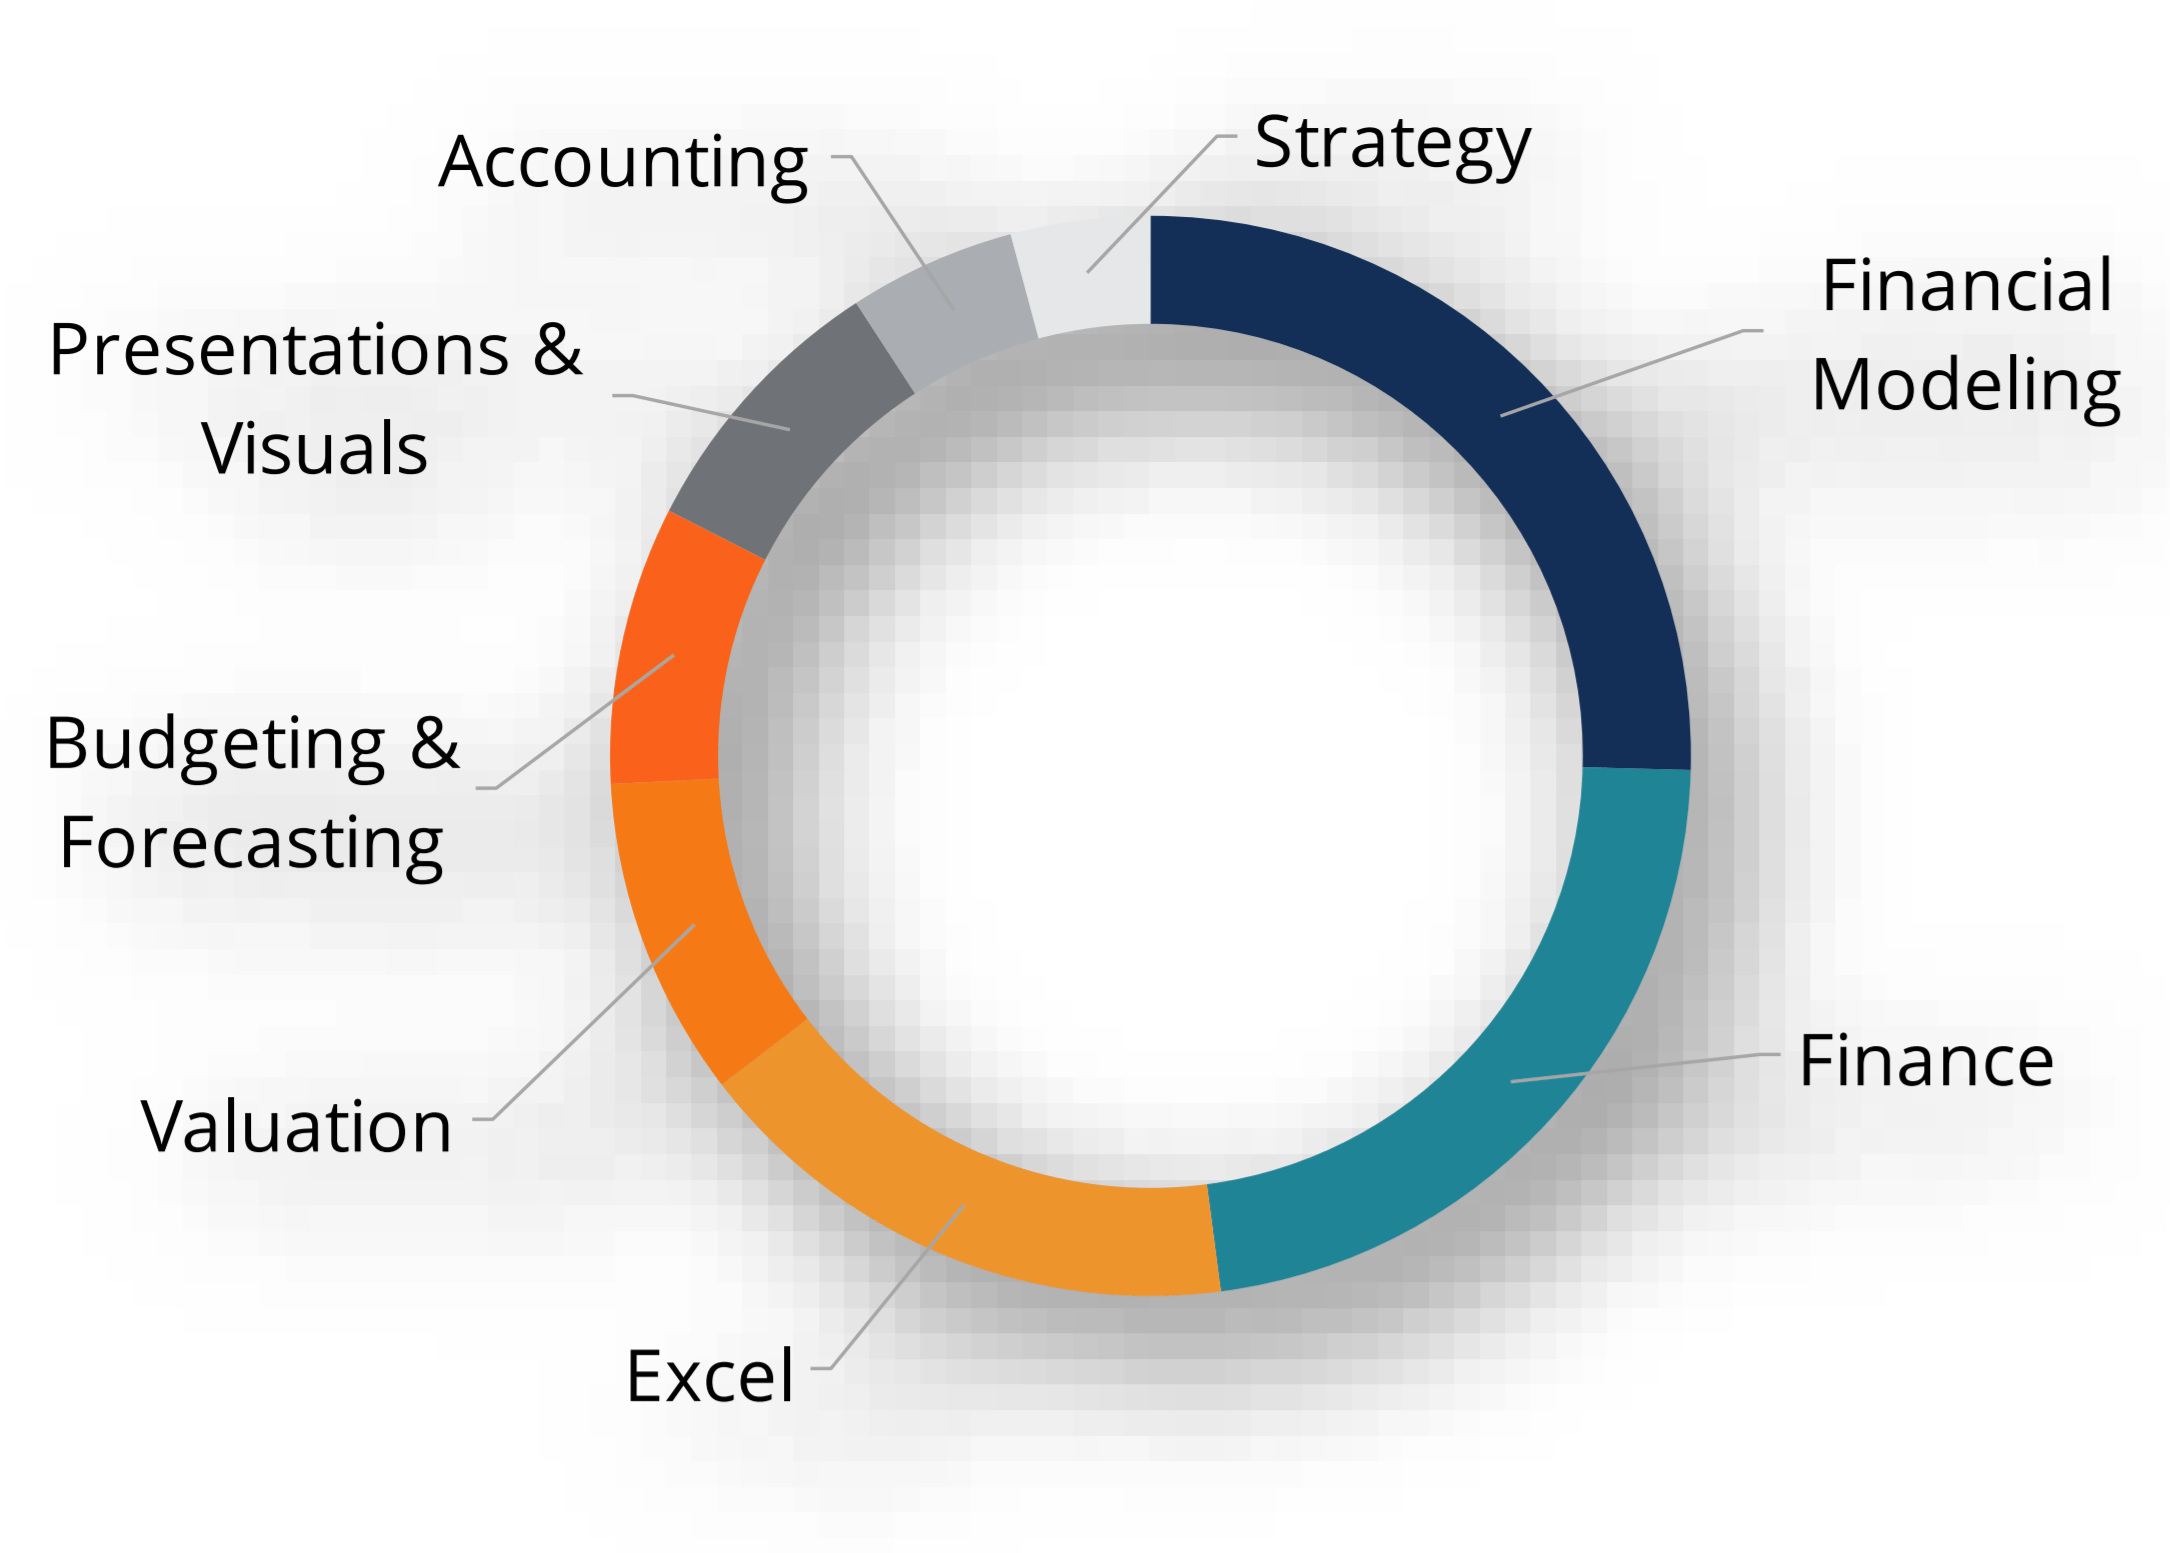
A well rounded financial analyst possesses all of the above skills!
CFI is the global institution behind the financial modeling and valuation analyst FMVA® Designation. CFI is on a mission to enable anyone to be a great financial analyst and have a great career path. In order to help you advance your career, CFI has compiled many resources to assist you along the path.
In order to become a great financial analyst, here are some more questions and answers for you to discover:
To master the art of Excel, check out CFI’s Excel Crash Course, which teaches you how to become an Excel power user. Learn the most important formulas, functions, and shortcuts to become confident in your financial analysis.

Launch CFI’s Excel Crash Course now to take your career to the next level and move up the ladder!
Access and download collection of free Templates to help power your productivity and performance.
Already have an account? Log in
Take your learning and productivity to the next level with our Premium Templates.
Upgrading to a paid membership gives you access to our extensive collection of plug-and-play Templates designed to power your performance—as well as CFI's full course catalog and accredited Certification Programs.
Already have a Self-Study or Full-Immersion membership? Log in
Gain unlimited access to more than 250 productivity Templates, CFI's full course catalog and accredited Certification Programs, hundreds of resources, expert reviews and support, the chance to work with real-world finance and research tools, and more.
Already have a Full-Immersion membership? Log in