Data Validation in Excel
Secure your model's inputs and outputs by validating your data
What is Data Validation in Excel?
Data validation in Excel is an existing and accessible tool to ensure data integrity while building a financial model. Although it is only an easy extra step, data validation in Excel is an extremely useful tool to secure your model inputs and outputs. This article is intended to provide readers with a better understanding of why and how to use data validation, in simple and easy steps.
Example of Data Validation in Excel
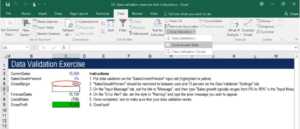
In this example, we will use data validation to ensure that the gross margin stays within the range of 0 to 0.9.

In Excel, data validation is found on the “Data” ribbon, under “Data Validation.” Once clicked, the data validation window will pop up. It will show three tabs: Settings, Input Message, and Error Alert.
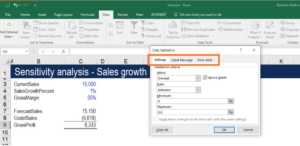
In this screenshot, we can see that the “GrossMargin” input range has been set to between 0 and 90 percent. Although you cannot see the “Error Alert” tab, it has been set to alert users with a warning message if the “GrossMargin” input has been set outside of the range. This is a useful example, as gross margins are always between 0 and 1; however, it is extremely rare that gross margins exceed 90% of sales. In order to ensure data integrity and eliminate the possibility of gross margin exceeding 90% of sales, data validation has been used.
Using Data Validation to Find Invalid Data
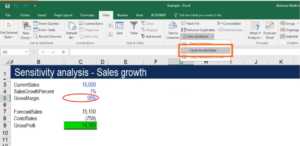
If you put data validation on your model inputs, you can check if users have set inputs outside the preset data validation ranges. To mark any invalid data inputs, you can click on the “Data” ribbon, then “Data Validation”, and finally, “Circle Invalid Data.”
Demonstration of Data Validation in Excel
For this demonstration and throughout the course, we used Excel 2016.
Next, on the “Input Message” tab, we will type our message to be shown on our input. Under title, we will write “Please Note:”, and under input message, we will write out the message: “Please input your assumption for gross margins. Historically gross margins are between 0 and 90 percent”. Before clicking on the “Data Validation” button, use your cursor to select the input you would like to validate. In this demonstration, the chosen input is “GrossMargin.” Identical to the example above, we will set our “GrossMargin” input to fall between 0 and 0.9. To put data validation on this input, simply click “Data Validation” and set your criteria in the “Settings” tab.


When this setting is finished, on our “GrossMargin” input, it will display the following:
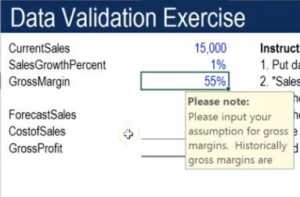
The input message will act as a reminder for any new users to set the input between the range as written on the note.
Finally, on the “Error Alert” tab, you can set different alert styles, including “Stop”, “Warning”, and “Information”. For our demonstration, we will set the style to “Warning”. The title will be “Warning” also, with the error message to “You have input a gross margin assumption that is not between 0 and 90 percent.”

We then click OK to complete the data validation settings. Now, we will type in 95% into the “GrossMargin” input to ensure that the error message is working as intended. If completed correctly, this error screen will pop up as you put 95% on the “GrossMargin”:
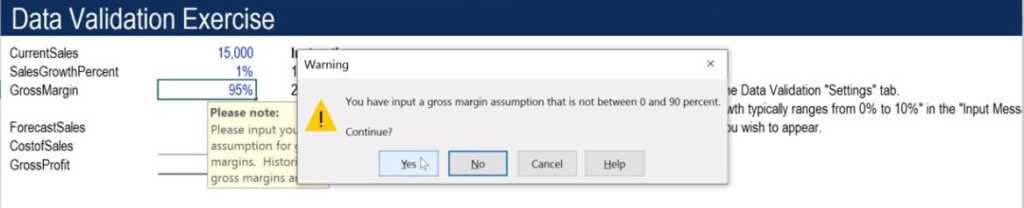
When the error message appears, we will click “Yes” to continue. Then, we will use the “Circle Invalid Data” function as explained above to find the input that is outside of our preset range.
Summary
The data validation tool in Excel is an easy-to-use skill that allows users to ensure data integrity and thus use their models with confidence. In this article, we explored the step-by-step process of putting data validation on selected inputs, setting input criteria, selecting an input message and, finally, error alert. We also learned how to mark invalid data by using the “Circle Invalid Data” tool.
Additional Resources
Thank you for reading CFI’s guide to using data validation in Excel. See the following additional free CFI resources to continue becoming a world-class financial analyst.
Analyst Certification FMVA® Program
Below is a break down of subject weightings in the FMVA® financial analyst program. As you can see there is a heavy focus on financial modeling, finance, Excel, business valuation, budgeting/forecasting, PowerPoint presentations, accounting and business strategy.
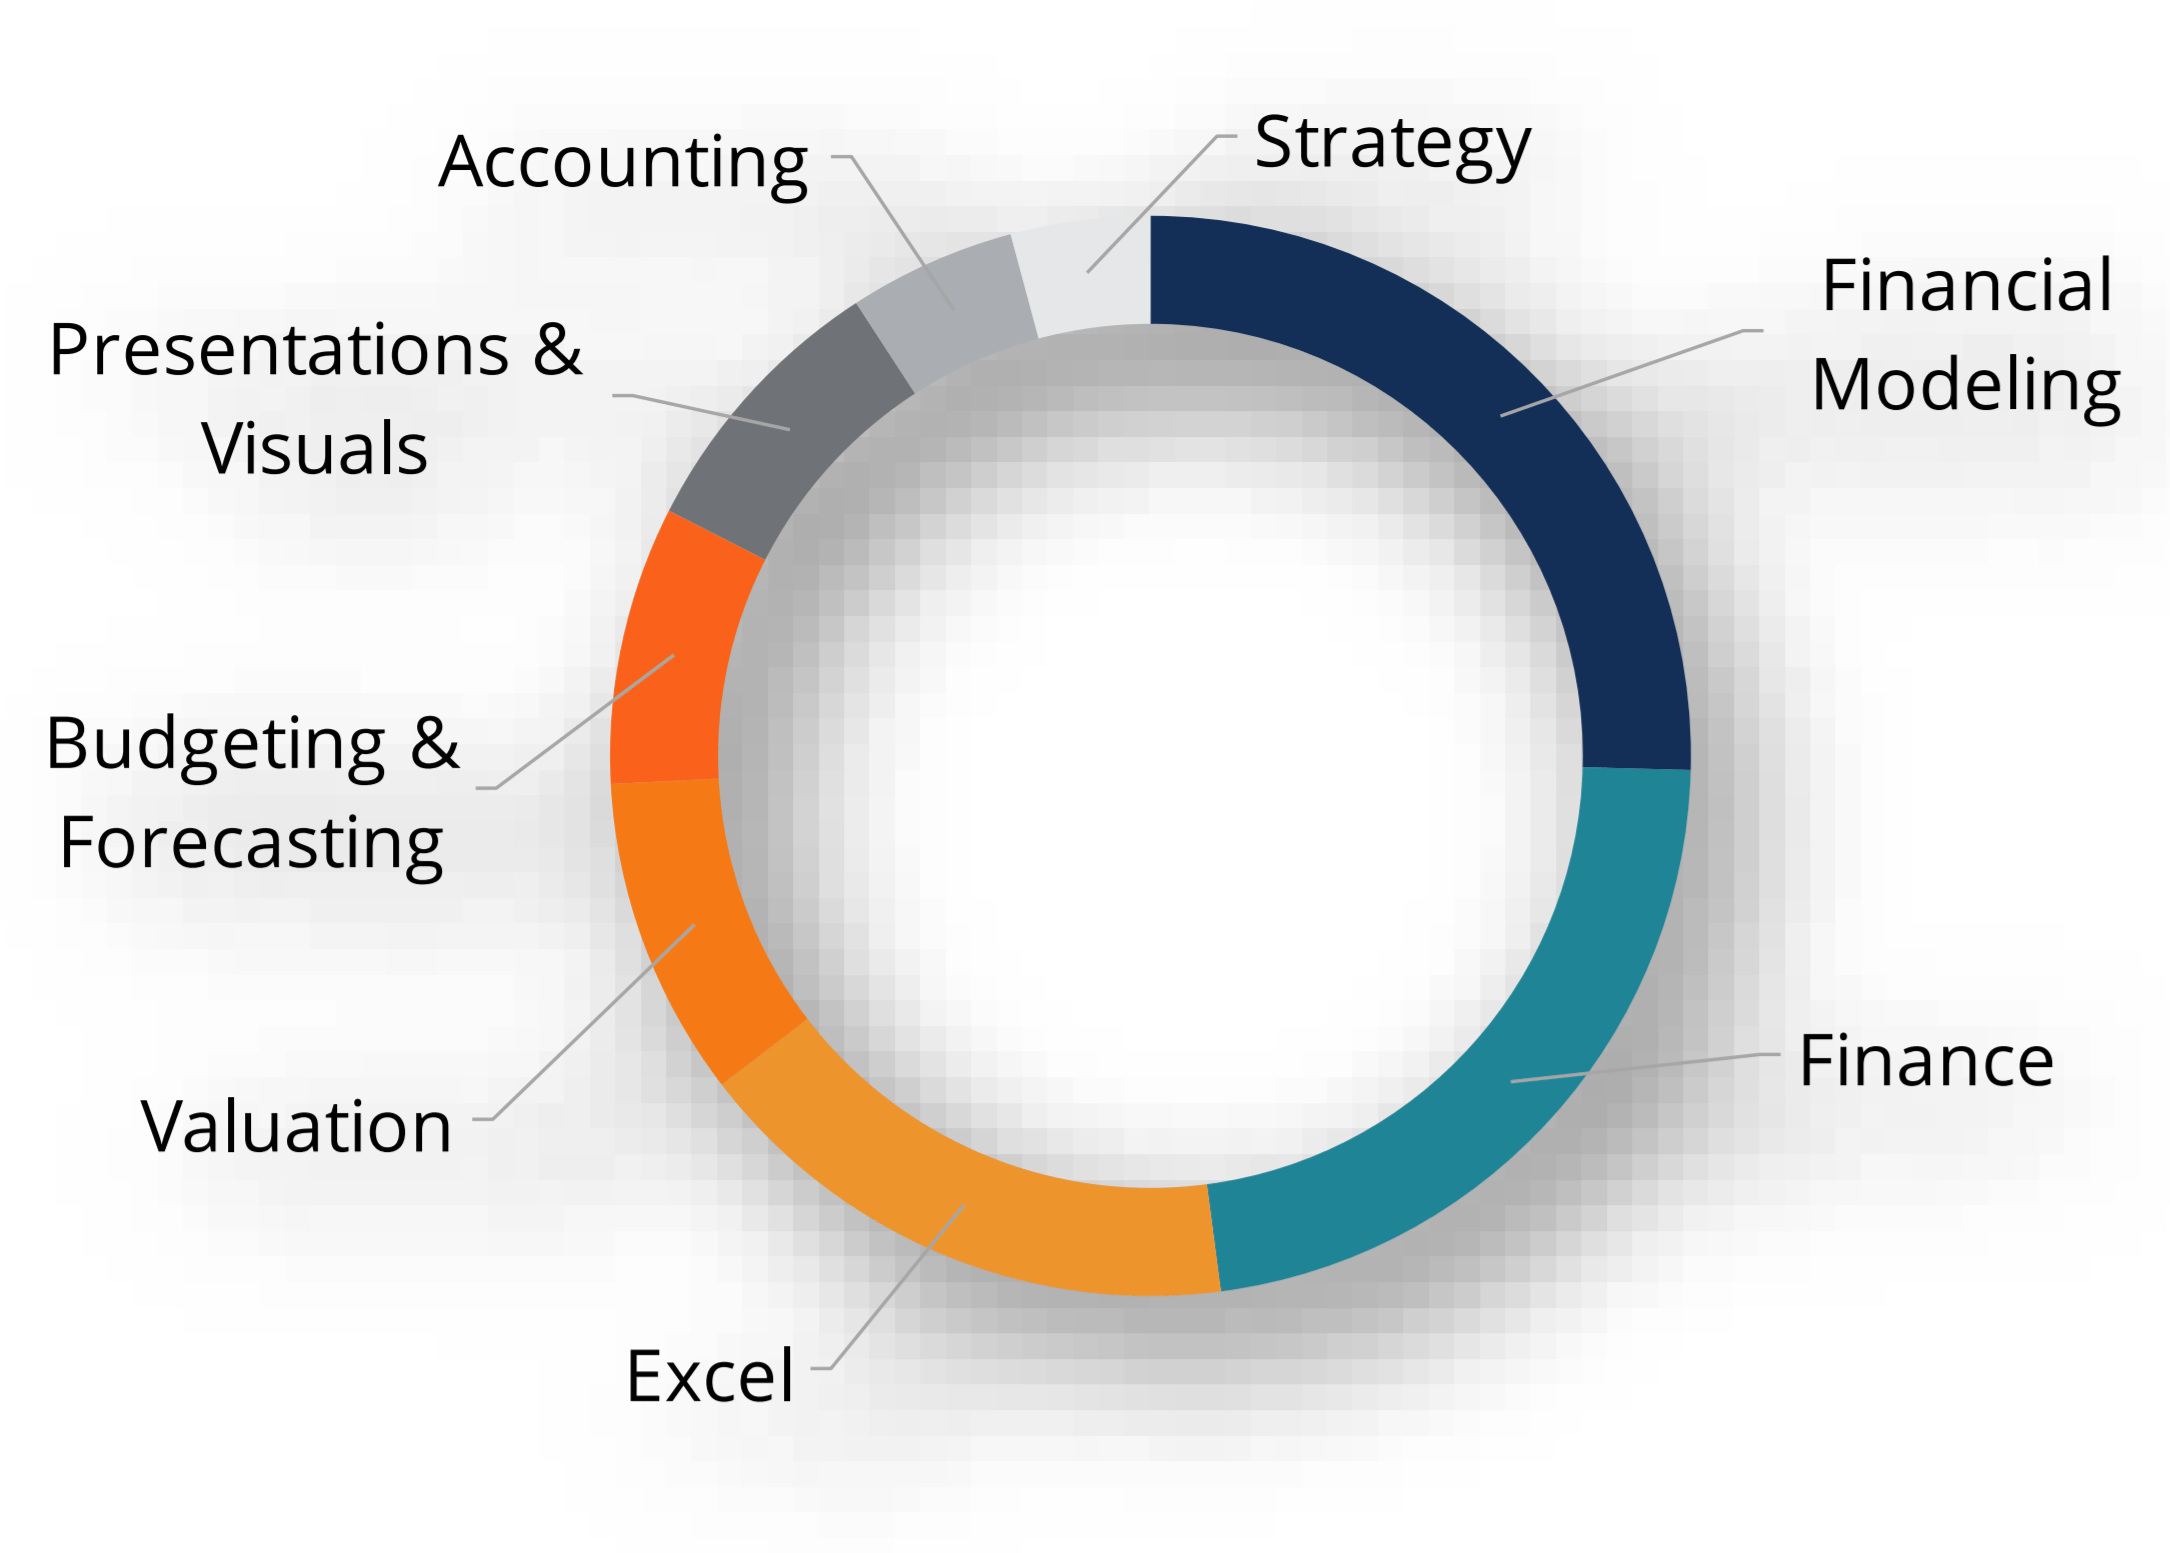
A well rounded financial analyst possesses all of the above skills!
Additional Questions & Answers
CFI is the global institution behind the financial modeling and valuation analyst FMVA® Designation. CFI is on a mission to enable anyone to be a great financial analyst and have a great career path. In order to help you advance your career, CFI has compiled many resources to assist you along the path.
In order to become a great financial analyst, here are some more questions and answers for you to discover:
- What is Financial Modeling?
- How Do You Build a DCF Model?
- What is Sensitivity Analysis?
- How Do You Value a Business?
Excel Tutorial
To master the art of Excel, check out CFI’s Excel Crash Course, which teaches you how to become an Excel power user. Learn the most important formulas, functions, and shortcuts to become confident in your financial analysis.

Launch CFI’s Excel Crash Course now to take your career to the next level and move up the ladder!